WVM
Play WVM
WVM Screenshots


WVM review
Comprehensive walkthrough, tips, and player insights for WVM
WVM is an interactive visual novel that follows a college basketball recruit navigating campus life, relationships, and choices that shape the narrative. This article focuses only on WVM and provides a practical, player-focused guide that includes story context, how the game plays, installation and performance tips, and hands-on strategies to reach desired outcomes. Whether you’re new to WVM or returning to pursue alternate paths, this walkthrough-style guide offers personal anecdotes, actionable steps, and planning advice to improve your experience.
Getting Started with WVM: Install, Requirements, and First Steps
So, you’ve heard the buzz about WVM and you’re ready to dive into its unique world of relationships, basketball, and personal growth. Awesome choice! 😊 But before you can sink hours into the story, there’s the crucial—and sometimes slightly tedious—step of getting the game from your screen into your hands. Don’t worry, I’ve been there, staring at a download link and a zip file, feeling that mix of excitement and “I hope I don’t mess this up.” This guide is here to turn that anxiety into confidence, walking you through every step from the WVM download to those first, story-shaping decisions.
Think of this as your pre-game warm-up. We’ll cover the technical specs, the installation nitty-gritty, and the initial setup that makes your playthrough smooth and personal. By the end, you’ll be launching the game knowing you’re set up for success, ready to avoid the classic first-timer blunders (like the major one I made!). Let’s get your journey started on the right foot.
System requirements and installation checklist 🖥️
First things first: let’s make sure your PC can handle the game. One of the most common frustrations is a stuttering slideshow because you missed a spec. The good news is that WVM, being a visual novel, isn’t typically a hardware crusher. However, paying attention to the WVM system requirements ensures you get the best possible experience, with smooth animations and quick loading times.
Here’s a clear breakdown of what you’ll need. I always recommend aiming for the “Recommended” specs if you can—it just makes everything feel more polished.
| Component | Minimum | Recommended |
|---|---|---|
| OS | Windows 7 or newer | Windows 10 |
| CPU | Dual-core 1.8 GHz | Quad-core 2.4 GHz or better |
| RAM | 4 GB | 8 GB |
| GPU | Integrated graphics (OpenGL 2.1 support) | Dedicated GPU with 1GB VRAM |
| Storage | 3 GB available space | 5 GB available space (for future updates/saves) |
✅ Quick Tip: The most common issue isn’t raw power, but missing software. Before you even start your WVM download, ensure you have the latest graphics drivers and that Windows is up-to-date. Visual novels often rely on specific runtimes.
Now, for the main event: how to install WVM. The process is pretty standard for indie games, but a few key steps will save you headaches.
- Find a Trusted Source: Always get your WVM download from the official itch.io page or the developer’s Patreon. This guarantees you get a clean, complete file and support the creators directly. 🔒
- Download the Package: You’ll typically download a
.zipor.rarfile. This is the game archive. The file size will give you a clue about the WVM system requirements for storage. - Extract Everything: This is the step newcomers often fumble! Do not try to run the game from inside the compressed archive. Right-click the downloaded file and select “Extract All…” or use a tool like 7-Zip. Choose a simple destination, like
C:\Games\WVMor a folder on your desktop. Avoid super deep file paths or protected system folders (like Program Files). - The Magic Folder: Once extracted, look inside the main folder. You should see an executable file (
.exe) named something likeWVM.exeorGame.exe. This is what you’ll run. - Permission to Play: The first time you run it, especially on Windows 10/11, you might get a SmartScreen warning. This is normal for unsigned indie games. Click “More info” and then “Run anyway.” You may also need to right-click the
.exeand select “Run as administrator” if you encounter any permission errors when the game tries to write WVM save files.
✨ Personal Insight: I once extracted a game to a OneDrive synced folder. Big mistake. The constant syncing caused weird save corruption and lag. Install your games to a local drive you control!
First-time setup: saves, settings, and controls ⚙️
Great! The game is installed. Now, resist the urge to just smash “New Game” immediately. Taking 5 minutes here will enhance your next 50 hours. This is your WVM settings guide and save management primer.
Upon first launch, the game might create its configuration and save folders. These are usually found in your system’s AppData or Documents folder. Knowing this is key for managing WVM save files later, especially if you want to back them up.
First, head straight to the Settings or Options menu. Let’s break down what to look for:
- Visual Settings: Here you can often adjust resolution and window mode. I highly recommend playing in Fullscreen or Borderless Windowed mode for immersion. Check for settings like “Text Speed” and “Auto-Forward Speed”—cranking these up a bit can improve pacing once you’re a comfortable reader.
- Audio Settings: Test the volume sliders for BGM, Sound Effects, and Voice (if applicable). Finding the right balance early makes dramatic scenes hit perfectly. 🎧
- Gameplay Settings: This is crucial. Look for any content flags or toggle options. Some visual novels, including WVM, may offer settings to skip certain mature content or enable/disable specific story elements. Configure this to match your comfort level—it’s your story.
- Control Mappings: WVM is primarily mouse-driven, but check if there are keyboard shortcuts for skipping text, opening the menu, or saving. F5 (Quick Save) and F9 (Quick Load) are common lifesavers!
Now, let’s talk about the most important habit you can form: saving. Often. WVM save files are your timeline. Before any big decision, after a meaningful conversation, or just when you’re about to stop playing—save. Use multiple slots. I use a system: Slot 1 is my “main” progressive save, Slots 2-5 are for major branch points, and Slots 6-10 are rotating quick-saves.
Here is your actionable checklist for the first hour of play:
- ☑️ Launch the game and immediately visit the Settings menu.
- ☑️ Adjust text speed, volume, and window mode to your liking.
- ☑️ Check for and configure any content toggle settings.
- ☑️ Open the Save/Load screen to see where your WVM save files will live.
- ☑️ Start a new game and save immediately in Slot 1 with a name like “Start.”
- ☑️ Play through the introduction, saving in a new slot (Slot 2) when you sense the first significant character interaction or choice approaching.
- ☑️ Experiment with the Quick Save (often F5) feature after a scene you enjoy.
Initial choices that shape your first playthrough 🧭
Alright, the tech is sorted, and your settings are perfect. Now for the fun part: stepping into the story. WVM, like many great narrative games, uses its opening moments to establish your character and relationships. The WVM first play tips I can give you all revolve around being present and intentional in these early chapters.
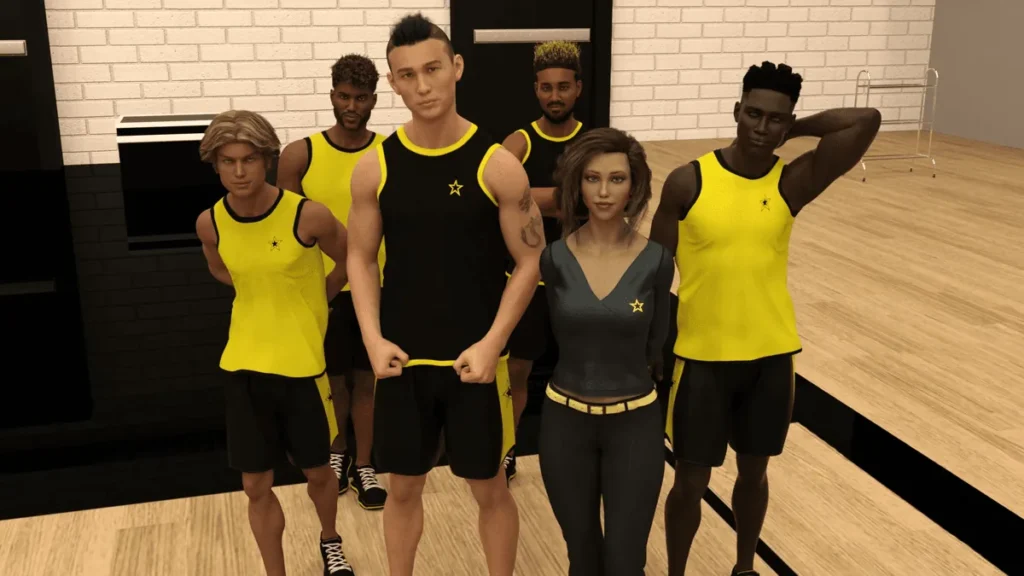
You’ll be asked questions—about your past, your attitude towards your new situation, and your immediate reactions to people. These aren’t just flavor text. They often set affinity flags with key characters. Early dialogue choices with characters like your new teammates or potential romantic interests can gently nudge future conversation options and availability.
My biggest piece of advice? Play as yourself first. Don’t try to meta-game or guess the “best” outcome. The magic of a first playthrough is experiencing the story organically. If you’re a kind person, be kind. If you’re sarcastic, let that sarcasm fly. This creates a genuine, memorable story that you can later contrast with alternate playthroughs.
🏀 A Personal Anecdote – Learn from My Mistake! On my very first playthrough, I was so engrossed in the basketball practice scene and the banter that I completely missed a subtle narrative cue. A character asked a seemingly casual question about my priorities at the new school. I answered flippantly. I didn’t save beforehand. That single response locked me out of an entire, deeply rewarding friendship branch for hours of gameplay. I only realized it much later, and by then, I was too invested to go back. The lesson? The “shaping” choices can be deceptively simple. If a question feels weighty or character-defining, that’s your signal to create a new save file.
These WVM first play tips are about embracing the journey without fear of missing out. Use multiple WVM save files at these soft branching points. Save before choosing a practice drill, before deciding who to sit with at lunch, and definitely before any significant after-school plans are made. This isn’t about spoiling the fun with savescumming; it’s about preserving your ability to explore different facets of your personality without restarting the whole game.
Your initial setup is complete. You’ve mastered the WVM download and installation, optimized your settings, and built a solid save strategy. You understand that your early choices matter, but you’re not paralyzed by them. You’re now ready to press “New Game” with confidence, knowing your technical foundation is solid and you’re prepared to fully engage with the rich story ahead. Now, go meet your team. Your story is waiting.
WVM offers a layered interactive experience that rewards planning, experimentation, and careful save management. This guide covered installation and first steps, story and character mechanics, core gameplay systems, advanced routing and speedrun strategies, and practical safety and performance advice. Use the checklists and save-point plans to reduce frustration, try alternate routes to unlock new content, and engage with the community for tips and creative builds. If you found these strategies helpful, save this guide for your next run and share your own discoveries with other players.